Saturday 31 December 2016

Present

The best present of all is to be present...

A Christmas morning surprise

Grandma cuddles

Hello, Great Grandma!

Making shortbread with Grandpa

A Winger Christmas

Cousin craziness

Kenneth with Great Grandpa Ken (and Great Grandma)

A visit with the Bergs too

Playing in Manitoba snow


Celebrating God-With-Us

We were delighted to be able to surprise my in-laws by joining them for Christmas this year.  It's been several years since we've been able to be with them for Christmas, and most of the family hadn't had a chance to meet Kenneth yet.  Being there with them was very special.  It reminded me that no matter what is wrapped under the tree, the very best present is presence - the presence of family and friends and our Saviour Jesus who is Emmanuel.  God is indeed with us, and we are so thankful.

I wish all of you a most blessed new year, and that you may know the love and presence of our God who is with us.

Sunday 25 December 2016

Merry Christmas 2016


Merry Christmas!

The past year has had many struggles and challenges, but also many joys and blessings.  We are so thankful for our family - both the family of blood and those who have chosen to be part of our family.  Jesus gives us hope for each new day, and we have a lot to be thankful for!

Love from the Wingers


Friday 23 December 2016

Chicken Pot Pie With Biscuits


I really like chicken pot pie.  To be honest, I like any kind of meat pie.  Or just any kind of pie.  Basically, I love pastry.  But chicken pot pie is pretty great!  However, making that oh-so-yummy pastry takes extra work, and most days I just don't have time.

One day I was really wanting to make chicken pot pie for supper, but didn't have the extra time or energy to make pastry.  I was contemplating this when I remembered something I saw somewhere once... maybe on Pinterest.  The idea was to make chicken pot pie filling and then top it with biscuits instead of pastry.  Now the pastry may or may not be the best part, but I thought it would be worth giving it a try anyways!

So here it is: Chicken Pot Pie With Biscuits


It starts with lots of chopping.  First you chop some chicken into pieces and fry them.  Then you chop whatever veggies you want and fry them.  I used onions, garlic, potatoes, carrots, and mushrooms.  I also added some spinach and chickpeas later on.  After the vegetables have softened a little, add the chicken you cooked earlier and just enough broth to cover everything.  Cook until the potatoes, etc. are almost as soft as you want them to be.


Mix some flour with milk (or almond milk like I did) and pour into the meat and veggie mixture, stirring as you pour.  This will thicken the gravy.  Continue to stir as it heats up again, then remove from the heat and spoon into a casserole dish.

Make some biscuit dough for the top.  Here's an easy recipe:

Mix:
2 c  flour
2 tbsp sugar
1/2 tsp salt
4 tsp baking powder
Add:
1/2 c oil
1 c milk

Form the dough into biscuit-sized lumps and cover the top of the filling mixture.  Bake in a 400 degree oven for about 20 minutes.


Serve so that each person gets a biscuit on top of their chicken and vegetables.

I was pleased with how it turned out, and everyone said they really enjoyed it!

Success!


Wednesday 21 December 2016

Maxed Out

Having kids has pushed me to my limits more than anything I have ever done.  I really didn't expect that.

Direct multiple plays with casts of over 50 kids aged 6-18?   Sure!

Travel to the other side of the world by myself to go to Bible school for a year?  Why not?

Get a B.A. with the highest GPA in my graduating class?  It may have cost me some stress and a couple all-nighters, but I did that too.

But try to put a teething toddler who is coming down with a cold to bed when he is determined to not be in his room, while the baby (who is also teething) starts crying whenever I leave to try to put the toddler back to bed?  Within minutes I become an emotional wreck who is ready to curl up in the fetal position and never move again.

I'm used to feeling much more competent than this.

Thursday 15 December 2016

Paper Snowflakes Part 2

Last week I wrote about making paper snowflakes and how they are one of my favourite winter crafts.  I made more snowflakes since then, and they turned out so well that I just had to share them with you!

This time I tried making name snowflakes.  Basically you make them the same way as a regular one, but when it is time to cut a design, you use a name as the design.


For example, here is one I made with Steven's name.  It is important to make sure all of the letters are touching each other and touching both the top and the bottom of the triangle.


Then you cut out the name so that it is all one piece.  Cutting it can be a little tricky depending on how long the name is and the kinds of letters it includes.  I managed with scissors, but it would have been a lot easier with an exacto knife.


The final result is beautiful!  And you would never guess that it's made from someone's name unless you knew to look closely.  And every name makes such a unique snowflake.  Here is Kenneth's:


I made a name snowflake for each person living in our home, and used them as name tags for our stockings!


I am getting very excited for Christmas!  What is your favourite thing about this time of year?

Tuesday 13 December 2016

Meditation on John 9:25

One Thing I Know

I don't know where I'll be in five years time,
Or what will happen next week.
I don't know what tomorrow will bring,
But there is one thing I know.

I don't know who my children will grow up to be,
Or how to equip them to face the world.
I don't know how to get my toddler to stay in bed,
But there is one thing I know.

I don't know the story of the homeless man on the corner,
Or why that famous person committed suicide.
I don't know the pain of those living with mental illness,
But there is one thing I know.

I don't know how to end war and violence,
Or stop the way we are harming the earth.
I don't know how I can change the world,
But there is one thing I know.

I was blind,
Now I see.


"He then answered, 'Whether He is a sinner, I do not know; one thing I do know, that though I was blind, now I see.'"

Friday 9 December 2016

Paper Snowflakes


One of my favourite winter crafts of all time is making paper snowflakes.  In the past some people have said they really like my snowflakes, so I thought I'd share how I make them.


Fold a square of paper in half diagonally.


Fold the bottom point up to the front,


And the top point down across the back, so the paper is divided in even thirds.


Fold in half.


Trim the uneven ends.


Cut a design, the crazier the better!  Just make sure not to cut away all of the folded sides, because then it would just fall apart.


Unfold and admire your finished snowflake!  Then have a snowflake-making party with your friends and decorate for Christmas!


Wednesday 7 December 2016

Toddler Logic

Logic according to toddlers:

Toddler:  Oops, I spilled some of this on the table.  I guess I might as well dump the rest of it out on the table too.

Toddler:  Mom wants me to play downstairs?  Try to get upstairs as quickly as possible.  Mom decides to take me upstairs?  Have a fit immediately.

Toddler:  Giving mom my half eaten apple means that I am entitled to a new apple.

Toddler:  If an apple is cut into slices it doesn't count as an apple anymore.

Toddler:  When mom says "no, you can't have a cookie," what she actually means is that I can pull a chair over to the counter and help myself.

Toddler:  Since I know how to open the door to my room, clearly that means that after mom and dad put me to bed I should try to escape my room fifty million times.


Logic according to moms:

Mom:  I know this great game, it's called we all go to sleep.

Thursday 1 December 2016

Stuffed Sting Sword


As I was deciding how to dress Steven up as Bilbo Baggins for Halloween this year, I came across an interesting dilemma: How do you show that he is the hobbit, not just a hobbit?  Clearly the answer was that he needed to be carrying Bilbo's iconic sword, Sting.  I actually have a replica of Sting that I got when I was a teenager to use with my Frodo costume.  (We used to dress up as characters from Lord of the Rings and hike up mountains.  Yeah, we were pretty awesome.)  However, giving an energetic almost-two-year-old an actual metal sword to carry around seemed like a pretty bad idea.  So I wasn't sure what to do.

Then I came across this blog post that explained how to make a plush Sting.  That was my solution!  It seemed doubly fitting, since we still have a plush sonic screwdriver from Steven's 11th Doctor costume last year.  Naturally, I didn't follow the pattern I found on the internet - I wanted to make mine better!


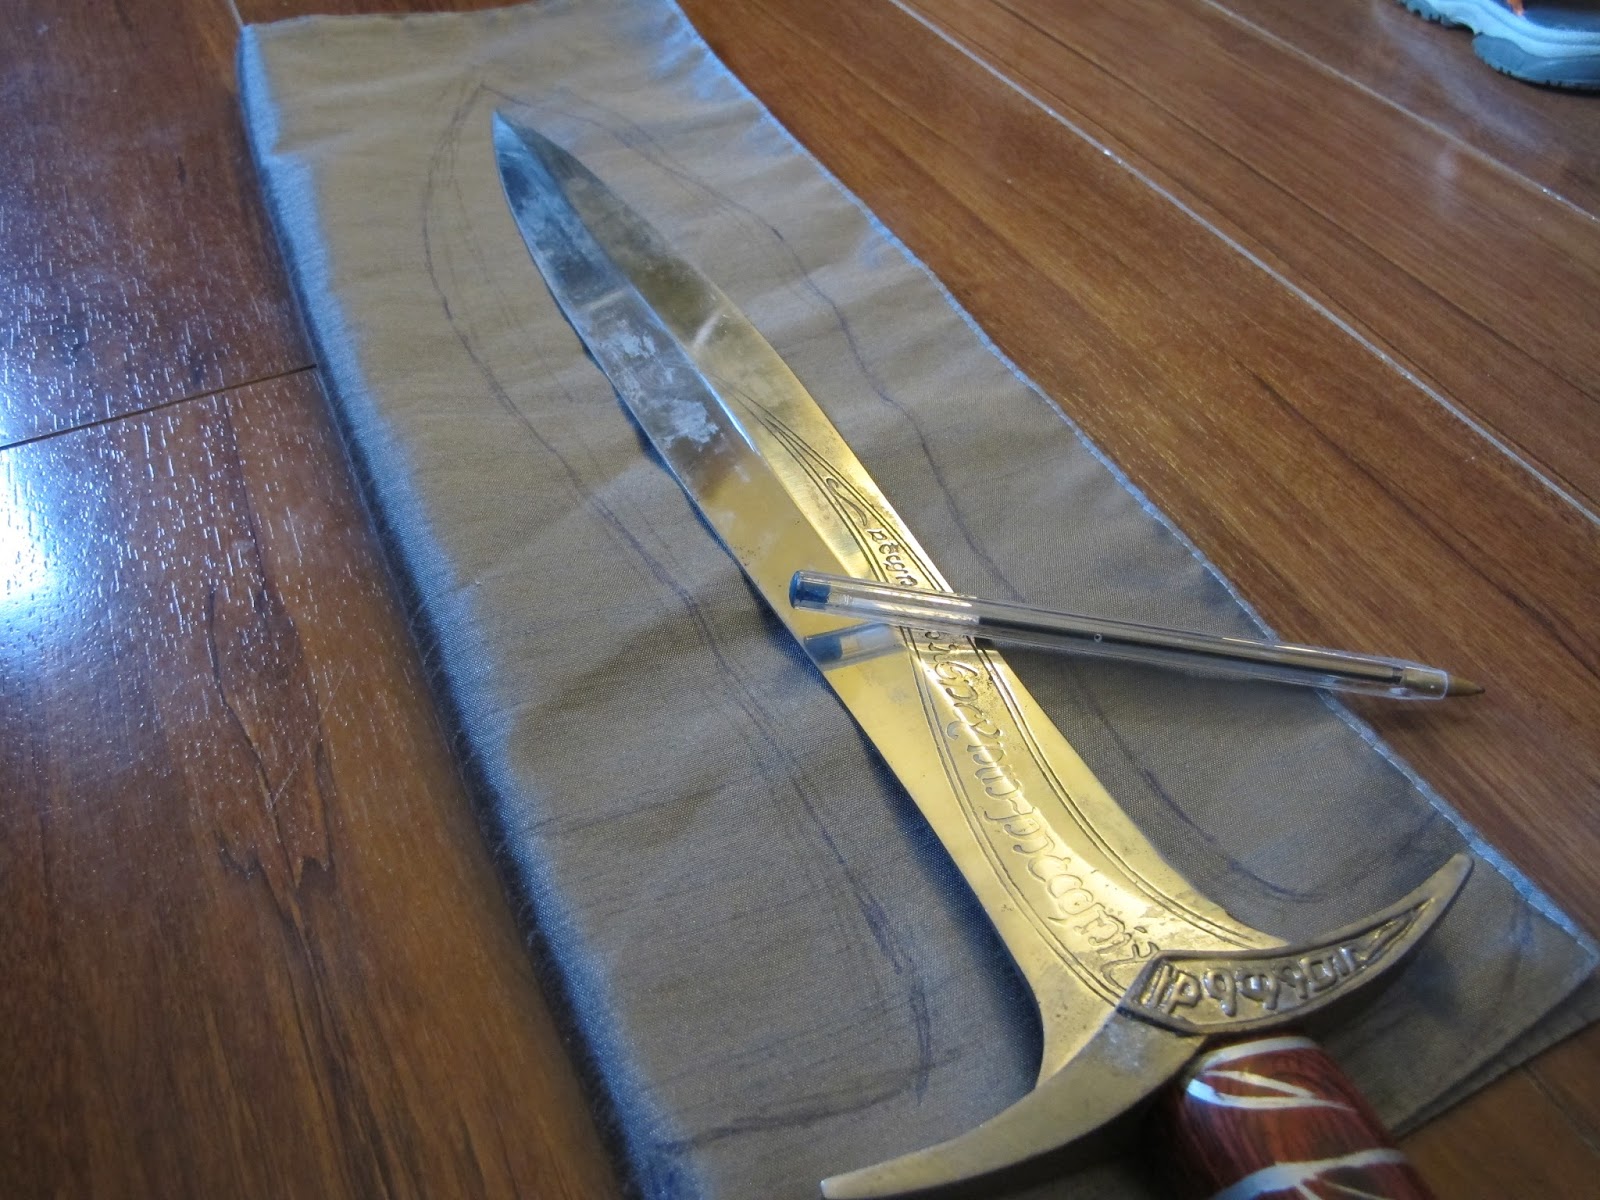
The main trick was finding the supplies I needed at such short notice.  (I decided I wanted to make it only 3 days before Halloween!)  Thankfully, I found a silver fabric placemat at a local thrift store - that worked for me!  I got a dowel out of my craft box, and found some brown fabric in my box of random fabric in the attic.  And of course, I had my replica of Sting to use as my pattern.


The first thing to do was trace the pieces I would need to cut from the fabric.  I traced quite widely around the sword, since I knew a sword made out of fabric and stuffing would have to be quite a bit bulkier than the original.


I cut the blade and guard together out of the placemat (one for each side), cut the grip out of the brown fabric, and cut the pommel and decorations out of the placemat.


Then it was time to start sewing!  I excavated my sewing machine and table (I hadn't done any sewing projects in a really long time!) and decided to use off-white thread, since I didn't have any silver.  I also had to be really quiet about it, since it was right outside of Steven's room where he was sleeping!


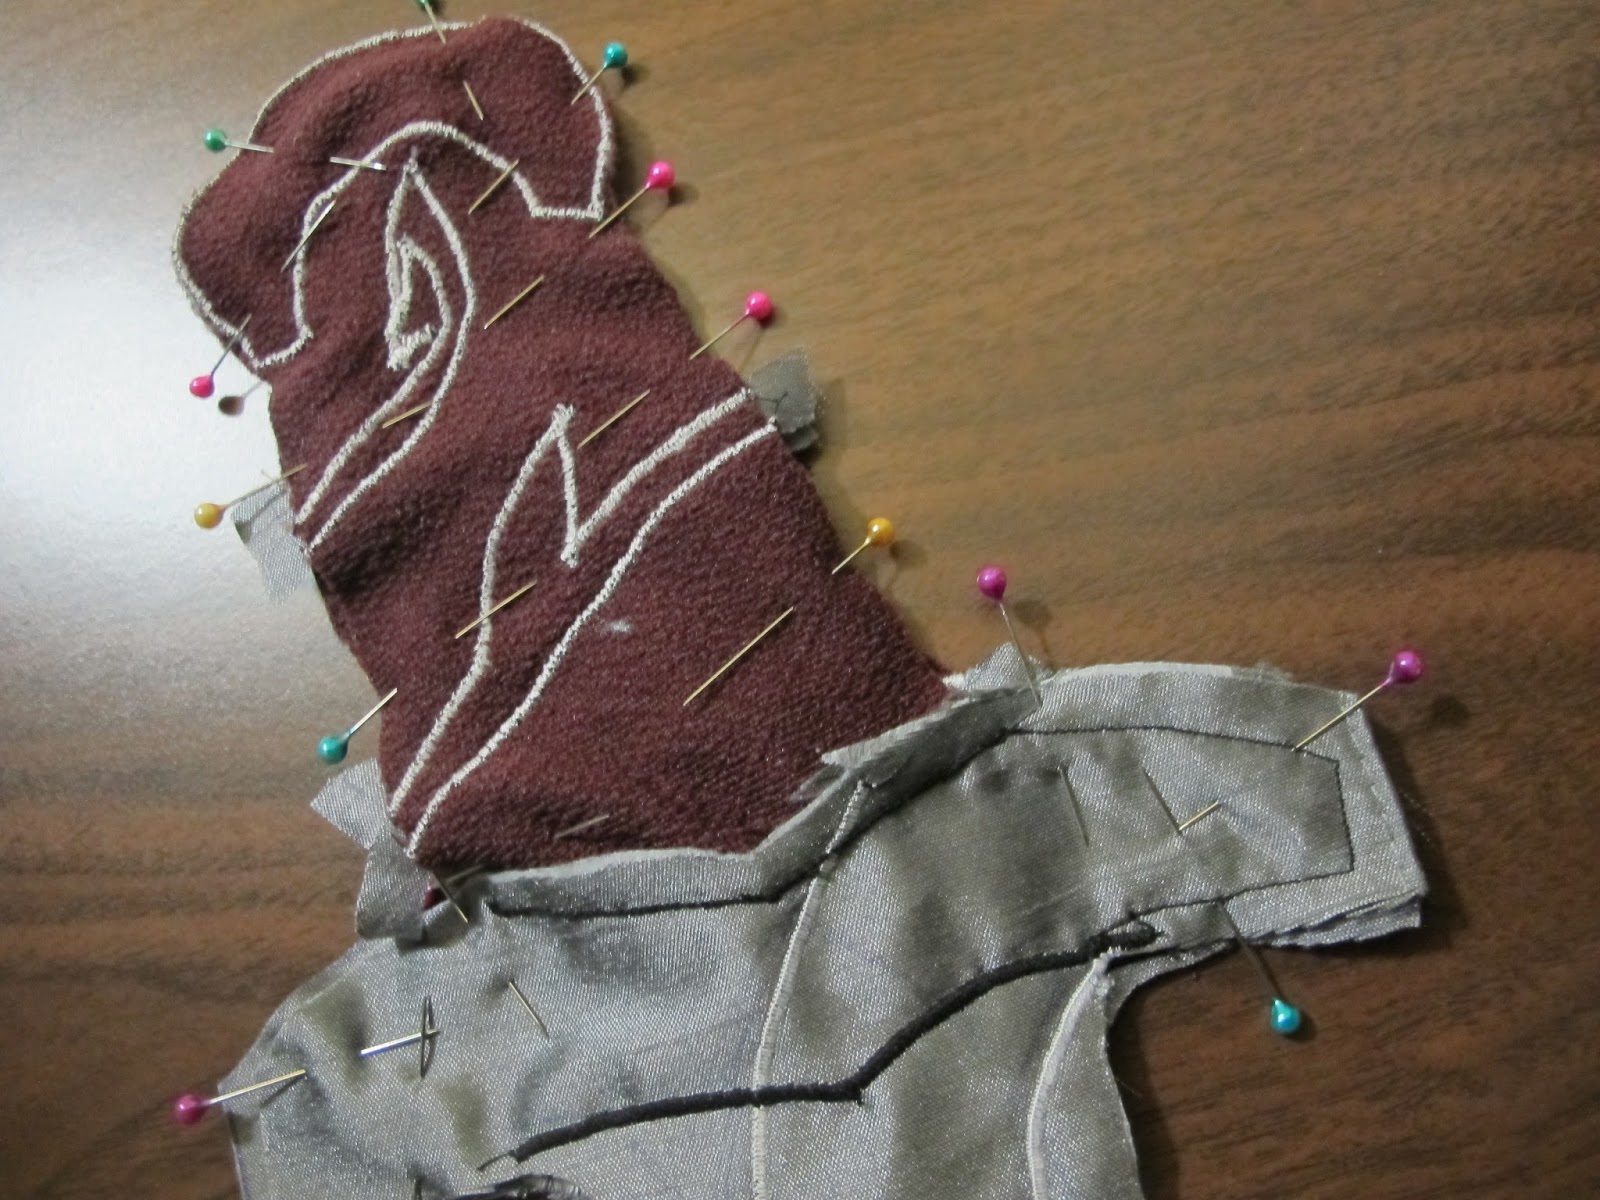
I started by using a tight zigzag stitch to attach the silver pommel and decorations onto the grip.


Then I used the same stitch to make a line between the blade and the guard and to trace the blade's design.


Then I pinned the two pieces together (right sides in!) and sewed them to make each side of the sword.


The two halves of the sword!


Next I pinned and sewed the two sides of the sword together, right sides in, and sewed it, making sure to leave a gap so I could turn it right-side-out.


Evidently I did not leave a large enough hole for turning the sword right-side-out, because that was the hardest part of the whole process!  But finally I managed it after a lot of effort and some definitely-not-swearing.  Then I used a dowel to poke out all of the corners and edges.


Then it was time to stuff the sword!  I put a dowel in the middle so that it wouldn't be floppy, and I packed stuffing around it.  I used some of the stuffing from an old pillow that I use for projects like this.


And finally, I hand sewed the final gap closed.  I am so pleased with how my "Stuffed Sting" turned out!  And I love that I can pass my love of crafts and Lord of the Rings on to the next generation.